Comparing KVM Adapter prices in Sri Lanka starts with the exact KVM switch and target computer. An adapter connects a computer to a compatible switching system. However, matching plugs do not guarantee compatibility. First, identify the switch model and the computer’s video and USB connections. Then check the supported module family and required functions before placing an order.
Richcom currently lists two products in this category, so this guide covers both available models. The HDMI option and the VGA option address different computer interfaces. Neither is a complete switching system by itself. Therefore, compare each as part of the intended installation, including the cable route, operator console and administrative workflow. Confirm current availability and package details in the listing.
KVM Adapter prices in Sri Lanka: define the system
Sketch the connection from target computer to adapter, adapter to switch and switch to operator console. This separates the server connection from the user’s display and input devices. It also helps distinguish an adapter from a video converter or a complete extender kit. A clear diagram makes it easier to identify missing components before the installation begins.
Next, record the switch model and any relevant firmware version. Some functions depend on the switch as well as the module. Virtual media and smart-card support are examples that need specific verification. Do not assume those features follow from the presence of a USB plug. If a function is essential, check its documented compatibility and test the real workflow.
ATEN (Taiwan) USB VGA KVM Adapter Cable – KA7170 (3Y)
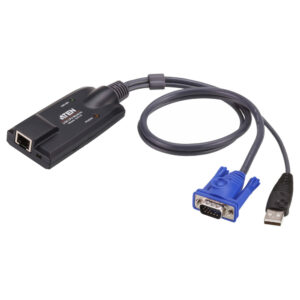
The KA7170 connects a compatible KVM switch to the VGA video and USB ports of a target computer. It is relevant when the machine exposes that combination and the selected switch supports this module. For example, a VGA-equipped server may benefit from a direct module connection rather than an HDMI adapter combined with another conversion device.
Inspect the computer-side ports before ordering. A machine may have several graphics outputs, but the required one must work during the administrative tasks you perform. Check the startup environment as well as the operating system desktop. Administrators often need keyboard access during firmware setup or recovery. Therefore, test the module at boot instead of checking only a loaded desktop session.
Also verify the supported picture mode for the complete system. VGA performance depends on the switching equipment and cable route as well as the adapter. A model name alone does not establish the usable resolution at every distance. Consult the relevant switch specifications, then test text clarity at the intended console. Detailed administration screens should remain readable throughout normal operation.
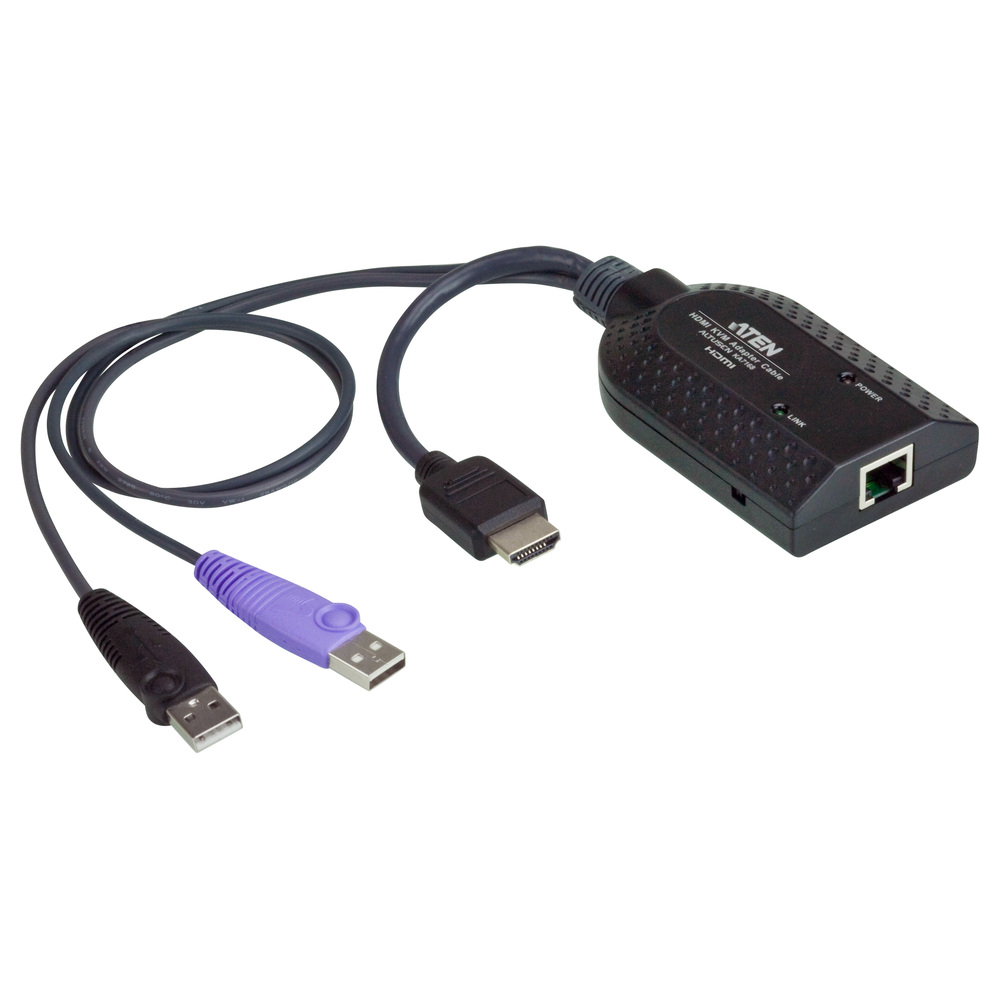
ATEN (Taiwan) USB HDMI KVM Adapter Cable – KA7168 (3Y)
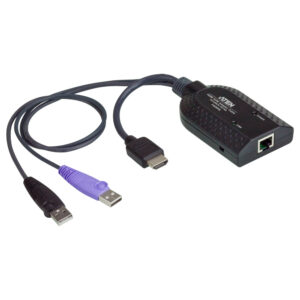
The KA7168 connects to the HDMI video and USB ports of a target computer. ATEN also documents virtual-media and smart-card capabilities, with restrictions for some connected switches. It is the feature-focused option in this comparison when the complete system supports those functions. However, the adapter alone does not enable every feature across every ATEN switch model.
A practical use is a compatible KVM installation serving computers with HDMI outputs. A direct interface match can reduce conversion components and simplify fault isolation. Nevertheless, HDMI does not imply unrestricted video performance. ATEN relates the maximum resolution to the connected switch and transmission distance. Check those system conditions before specifying a picture mode for the installation.
If virtual media or a smart-card reader is essential, confirm the exact switch pairing and computer-side connections. The workflow may also require a supported console device and configuration. Test the actual task before rollout, such as accessing recovery media or using the required authentication device. This turns an attractive feature name into a verified capability for your installation.
Check KVM adapter and switch compatibility
Use model-specific compatibility information for the switch and module together. Similar-looking RJ45 sockets may carry a dedicated KVM link rather than ordinary Ethernet. Therefore, do not insert a standard network switch simply because the plugs fit. Follow the installation diagram for the actual KVM system and keep its link separate from the general network unless documented support permits otherwise.
Also check the video format and conversion direction if adaptation is unavoidable. HDMI and VGA are different interfaces. An added converter creates another timing and power requirement. Where possible, select a module that directly matches the computer’s working management output. Then confirm that the switch can carry that signal to the required console with the desired control functions.
For the HDMI option, consult ATEN’s official KA7168 specification sheet. It identifies the interface and important virtual-media and CAC restrictions. Apply those notes to your exact switch model. Keep the compatibility decision with the purchase record, so that a future replacement follows the same checked configuration rather than relying on a similar-looking connector.
Plan adapter quantities and cable routes
Count the target computers that need connections rather than counting only the operator consoles. Record which module suits each computer’s interface. Also consider a compatible spare if quick recovery matters. Label the adapter beside the machine’s asset identifier and switch port. This reduces confusion when a technician later moves equipment or replaces a server with a different video interface.
Measure the installed route, including rack movement and service loops. Use the documented cable type and termination requirements. Avoid unknown patch links and unnecessary couplers. In addition, leave access to the computer-side plugs and protect them from strain. A module that requires removing several machines for inspection can make a simple loose-connector problem much harder to diagnose.
Install and test the complete KVM connection
First, test one computer, one adapter and the intended switch with a known-good cable. Confirm the display, keyboard and mouse from the operator console. Next, restart the target computer and check access during boot. Then test the optional functions that you identified as essential. Finally, repeat those checks over the installed cable route before rolling out the remaining modules.
Label both ends and record the switch port assignment after testing. Also check the supported disconnect and reconnect procedure. Where several operators share a switch, confirm how the system assigns control. A clear port record helps users select the intended machine and speeds up later fault isolation. Keep the normal restart and recovery procedure available to the support team.
Avoid common KVM adapter purchasing mistakes
One mistake is choosing an adapter solely by its video plug. Another is assuming every USB feature works with every switch. Also avoid treating the module as a standalone extender or Ethernet interface. Finally, test the operating workflow. Keyboard control during boot, readable management screens and required virtual-media tasks deserve verification before you commit to a larger deployment.
Maintain the modules and plan upgrades
Keep an installation record of module models, target computers, switch ports and cable routes. Check accessible connectors and strain relief periodically. If a fault appears, isolate the cable, adapter and computer with a known-good compatible arrangement. Change one component at a time and restore the documented settings. This makes the test useful instead of hiding the cause through several simultaneous changes.
Comparing KVM Adapter prices in Sri Lanka becomes easier once the switch and computer interfaces are clear. Choose the VGA module for a supported VGA and USB connection, or the HDMI module for a supported HDMI and USB system. Verify optional features separately. Then confirm current accessories and warranty information, and test the complete administrative workflow before handing over the installation.