Server rack earthing is part of a wider electrical and telecommunications bonding design. A rack may contain conductive cabinet parts, equipment chassis and cable pathways that require connection within the site’s approved protective-earth arrangement. This guide explains how to compare server rack earthing accessories and what information an installer should confirm before selecting parts in Sri Lanka.
Earthing and bonding are safety-critical. A product listing is not a substitute for design drawings, local electrical codes or the instructions supplied with the rack and equipment. IEC 60364-5-54 covers earthing arrangements and protective conductors in electrical installations; review the official IEC 60364-5-54 publication information with a qualified electrical professional. Have a competent installer verify the complete bonding path and test it using the required procedures.
What rack bonding and earthing accessories do
A rack earthing system provides a planned way to bond appropriate conductive parts into the facility’s protective-earth and telecommunications bonding design. The exact arrangement depends on the cabinet construction, equipment, pathways and site engineering. The rack accessory is one component of that design. It should be selected and installed only as specified by the product and project documentation.
An earth bar or bonding bar provides termination points for conductors that the design calls for. An earthing cable provides a connection between designated points when its conductor, length and termination style match the application. Both need correct attachment, secure terminations and documented inspection. Do not assume that adding a bar by itself bonds every rack component automatically.
Start with the approved site design
Before choosing an accessory, ask the project electrician or telecommunications designer for the rack bonding requirements. Confirm the intended bonding points, conductor type, conductor size, termination method and route. Check whether the rack manufacturer provides a designated earth stud or bonding kit. Follow the local electrical regulations and the site’s protection and verification process.
Do not drill a cabinet, remove coating or attach a conductor to an arbitrary point unless the rack documentation and approved design permit that work. An unsuitable connection can be loose, corroded, mechanically weak or electrically ineffective. A painted surface may not provide a reliable bond. The installer must use approved hardware and preparation methods for the exact rack model.
Plan the route so conductors are protected from sharp edges, movement and accidental disconnection. Avoid unnecessary loops and avoid routing that interferes with doors, sliding equipment or cable managers. Keep labels and records so future maintenance teams can identify the conductor’s purpose and source.
How to compare earth bars
Check the bar’s overall length, cross-section, material, finish, mounting method and hole pattern. Confirm the number and diameter of holes against the conductor lugs specified by the design. Verify whether mounting insulators, brackets, screws or bonding straps are included. An earth bar with enough holes may still be unsuitable if it cannot be mounted in the required location or accept the approved terminals.
Also verify the assembly’s intended use and ratings with its manufacturer. Do not infer fault-current capacity from a product’s dimensions alone. The qualified designer should determine whether a listed component meets the installation requirements and how it must be connected to the facility bonding system.
How to select an earthing cable
Match the conductor cross-section and length to the design. Check the terminal type at both ends, lug hole diameter, insulation, flexibility and any required colour identification. The model description may use a shorthand such as “2.5”; confirm the unit and whether that value represents cross-sectional area. Verify the actual conductor material and included lugs on the current product documentation.
The cable should reach without tension and should not be so long that it can snag or obstruct service access. Confirm how it will be routed and secured. Where a connection must move with a door or panel, use only a designed bonding jumper and installation method intended for that movement.
Rack earthing products listed for comparison
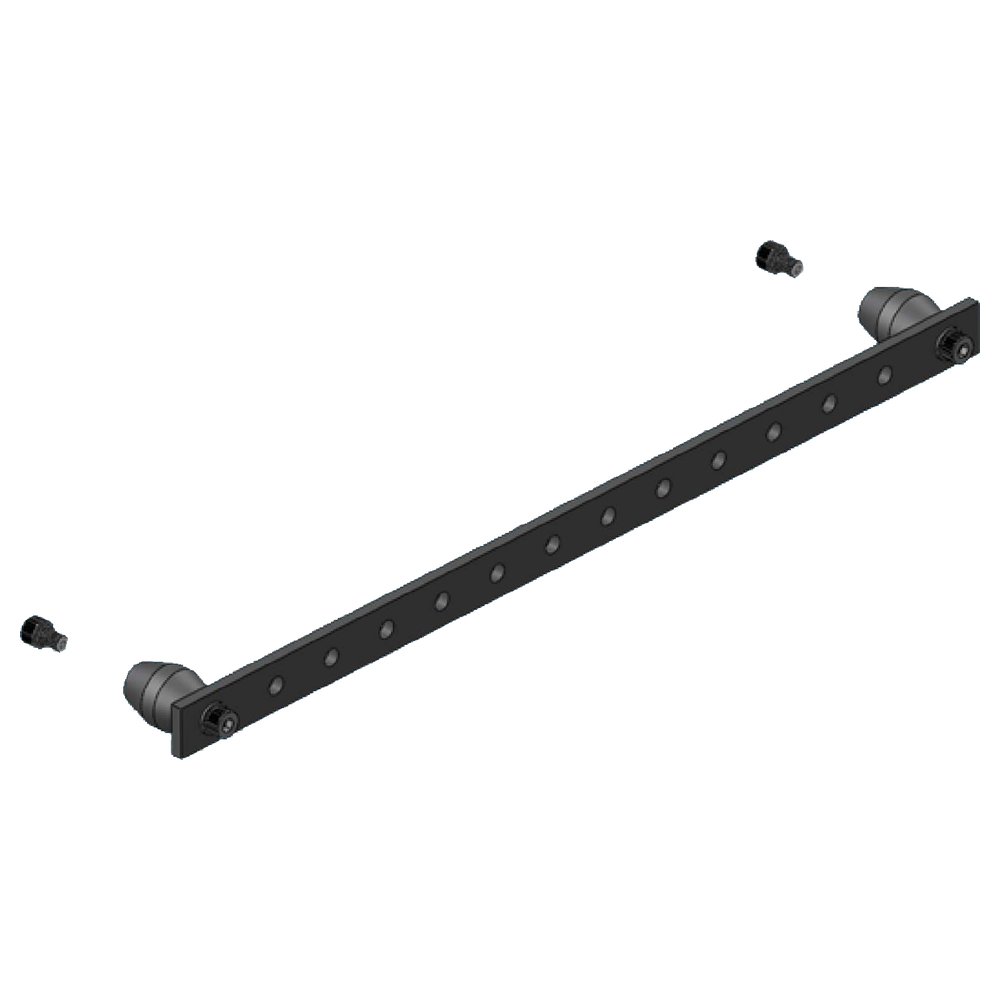
TIMIK (Canada) Earth Bar Assembly 12 Holes x Dia9mm, 19″ 25x5mm – 19A EBA
This TIMIK assembly is listed as a 19-inch earth bar with twelve holes of 9 mm diameter and a 25 by 5 mm format. Compare these dimensions with the approved conductor lugs, cabinet mounting arrangement and project requirements. Ask whether brackets or insulators are included and confirm the assembly’s material, rating and installation instructions before specifying it.
TIMIK (Canada) Earthing Cable 2.5 175mm – 19A EC2.5
The listed model reference identifies an earthing cable with a 2.5 designation and 175 mm length. Verify the exact conductor size and its unit, terminal style, lug-hole dimensions and supplied hardware. Check that the cable can connect the planned bonding points without strain. Confirm with the designer that its electrical characteristics are suitable for the intended connection.
Installation and inspection checklist
- Obtain the approved earthing and bonding design for the rack.
- Confirm rack model, bonding points and designated earth studs.
- Match the conductor, lugs, bar holes and fasteners to the specification.
- Verify product ratings and included components from current documentation.
- Protect conductors from sharp edges, heat, strain and accidental movement.
- Label and record each connection and its intended function.
- Have a qualified installer complete and verify the bonding connection.
- Document inspection and testing according to site procedures.
Common mistakes to avoid
Choosing a bar based only on the number of holes can result in an incompatible lug or mounting arrangement. Buying a cable based on its model shorthand without checking the unit can also lead to a mismatch. Confirm the actual specification with the supplier and installer before ordering.
Another mistake is treating a rack accessory as a complete earthing solution. The protective path includes more than one component, and the entire installation must be designed and verified. Do not rely on paint removal, a loose screw or a connection through unrelated hardware as proof of a sound bond. Use the connection points and method approved for the cabinet.
Finally, keep changes traceable. When equipment or rack layouts change, a technician should check that the documented bonding arrangement remains intact. Include earth bar and jumper condition in planned inspections and replace damaged or corroded parts only with components confirmed as suitable.
Frequently asked questions
Does every rack need a separate earth bar?
Requirements vary by cabinet, equipment and site design. Follow the project bonding drawings, rack documentation and applicable regulations. A qualified professional should determine the arrangement.
Can I connect the earth cable to any metal part of the rack?
No. Use only the designated point and method approved for the rack and installation. Arbitrary connections may not create a reliable electrical bond.
What should I verify before ordering?
Confirm the full model, conductor size and units, length, lugs, hole dimensions, mounting hardware, rating and compatibility with the approved design. Ask Richcom to confirm the currently listed product details.
Compare current server rack earthing accessories
Use the approved design to compare server rack earthing accessories prices in Sri Lanka. The category currently contains an earth bar assembly and an earthing cable, so this guide compares both listed items rather than adding unverified alternatives. Confirm availability, complete specifications and installation compatibility with Richcom and the responsible electrical professional.
Complete your rack installation
Network and Server Racks · Rack Power Distribution Units · Rack Shelves and Equipment Supports · Rack Cable Management · Rackmount Online UPS Systems
Check cabinet depth, mounting, equipment load and electrical connections for each component.